
Wave Soldering Machine Setup & Preventive Maintenance: A THT Line Commissioning Guide
Wave soldering machine setup and preventive maintenance for THT assembly lines: conveyor alignment, flux spray tank, solder pot and the daily care checks.
Sep 19, 2026 · Updated Sep 19, 2026 · Southern Machinery
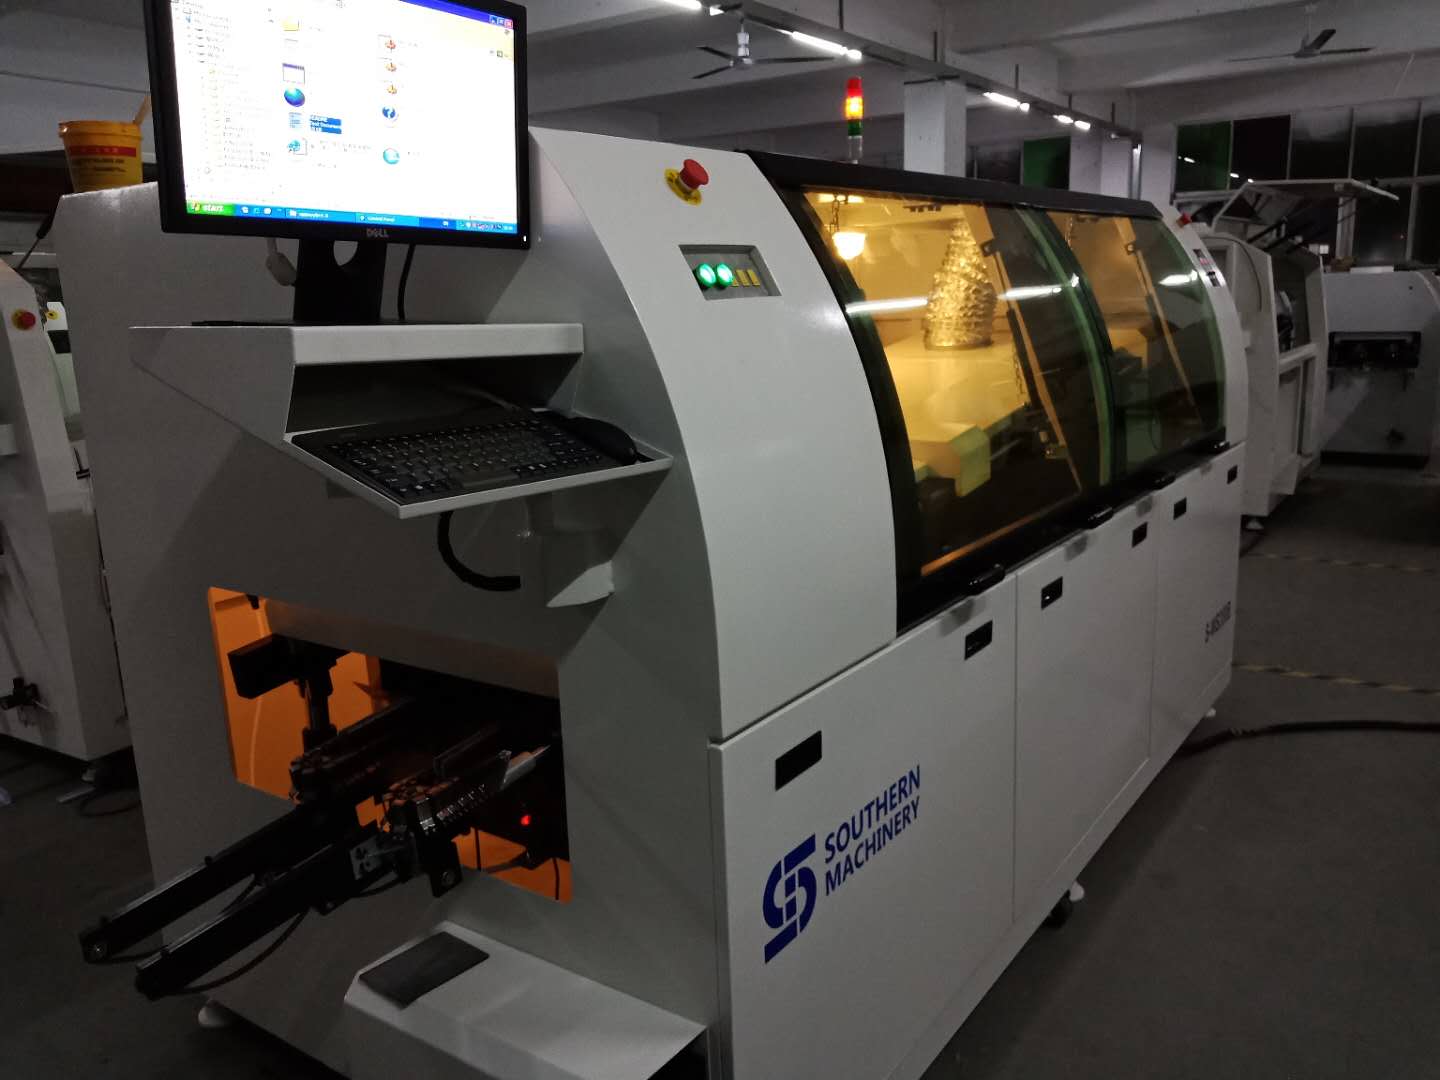
Wave Soldering Machine Setup & Preventive Maintenance: A THT Line Commissioning Guide
Most wave soldering problems are not thermal problems. They are installation and upkeep problems: a conveyor that is out of parallel, a flux spray pattern that has drifted, a solder pot whose dross is skimmed only when someone remembers, a timer that was never set to the shift pattern. The solder wave itself is usually doing exactly what it was told to do.
Southern Machinery designs and manufactures SMT and THT PCB assembly equipment in Shenzhen, China, and supports 237+ customers worldwide. A large share of the commissioning questions we receive are mechanical, not process-related — so this guide covers the mechanical side: how to set up a wave soldering machine, and how to keep it in condition once it is running.
What does "wave soldering machine setup" actually cover?
Setting up a wave soldering machine is the work between machine on the floor and first board passing at production speed. It breaks into five mechanical stages and one control stage:
- Accessory kit and spare parts — verify what shipped before you power anything on.
- Frame levelling and conveyor alignment — parallelism, transport height, board path.
- Flux spray tank installation and fluxer setup — spray pattern, coverage, containment.
- Solder pot preparation — alloy charge, level, dross management at first heat-up.
- Timer and control parameter configuration — shift patterns, start/stop, safety interlocks.
- Dry run, then first-article verification — prove the mechanical setup before you judge the profile.
Notice that pot temperature and wave height appear late in this list. They matter, and they are covered separately — but if the conveyor is misaligned or the fluxer is spraying the wrong footprint, no amount of profile tuning will produce a clean joint.
Stage 1: Verify the accessory kit and spare parts before power-on
The accessory kit is the least glamorous part of the delivery and the one that stops the most line start-ups. Inventory it against the packing list on day one, not on the day you need a part.
Southern Machinery ships the supporting kit with the machine — the parts and consumables that get a wave soldering line through its first weeks of production and its first maintenance cycle. A practical way to organise the check:
- Confirm the consumable wear items first (nozzles, filters, seals, transport claws or fingers).
- Confirm the mechanical tools shipped for alignment and adjustment.
- Confirm the electrical spares — fuses, sensors, switches.
- Confirm documentation: wiring diagram, parameter list, maintenance schedule.
- Photograph the kit as received. It settles future supply questions instantly.
Southern Machinery's accessory-kit walkthrough for the wave soldering machine:
Part 1 — Accessory kit supporting for wave soldering machine (spare parts)
Stage 2: Level the frame and align the conveyor
A wave soldering machine is a conveyor with a solder pot under it. Everything downstream depends on the board travelling at a constant height, in a straight line, at the moment it meets the wave.
Levelling. Level the frame on its feet before any adjustment. A machine that is out of level will hold the conveyor out of parallel no matter how carefully you adjust the rails, and the error will reappear every time the machine is moved for cleaning.
Conveyor parallelism and transport height. The two rails must be parallel within the tolerance stated in the machine's manual, and the transport height must match the upstream and downstream equipment. In a Southern Machinery THT line, the SBF330 Wave Solder Input Conveyor operates at a transport height of 800 mm ± 30 mm (or as specified), with 50 × 50 mm to 445 × 330 mm board capacity, 0.6–4 mm board thickness, a 35B pin chain with 3 mm or 5 mm pins, and 0.5–20 m/min adjustable speed. Chain systems in this class use reinforced titanium claws on high-strength aluminium rails with a 25B chain, driven by an inverter-controlled motor with manually adjustable slide angles — all of which need to be set in parallel, not independently.
The alignment check that matters. Run a set of test boards (or pallets) through the machine cold and watch for: the board shifting sideways on the rails, the leading edge dropping at the hand-off, or the trailing edge catching at the wave entry. If the board moves relative to the rail, stop and realign — do not compensate with conveyor speed.
How to align wave soldering machine conveyor for a smart EMS factory
Stage 3: Install the flux spray tank and set the fluxer
The fluxer determines how much chemistry reaches the board, and where. Both errors are expensive: too little flux produces incomplete wetting and bridges; too much wastes flux and drives up cleaning cost downstream.
Installation. Fit the flux spray tank, connect the supply and return lines, and confirm the tank sits level with no strain on the fittings. Verify containment: flux that reaches the machine base turns into a long-term corrosion and housekeeping problem.
Setup. On the S-SW450, the fluxer is a servo-driven spray fluxer — the spray footprint is programmable, which means it must be set, not assumed. Confirm the spray width matches the board width range you actually run (the S-SW450 accepts 50–450 mm). Narrow LED strips and wide industrial boards need different recipes.
First-run validation. Run a board through on flux only, with the wave off, and inspect the underside under UV or by pattern. You are checking coverage uniformity, edge definition, and that the spray stops cleanly at the end of the board.
Part 2 — How to install the flux spray tank of a wave soldering machine
Stage 4: Prepare the solder pot
The solder pot is where the setup decisions become permanent. Two things decide whether it serves you well for years or becomes a maintenance liability: the alloy charge and the way you handle dross from the very first heat-up.
Alloy charge and level. Charge the pot with the specified lead-free alloy and bring it to operating temperature under the machine's own control sequence. Confirm the pot is rated for the alloy you intend to run — the S-SW450 solder pot is titanium and lead-free capable, which matters for Sn/Ag/Cu alloys that attack lesser materials.
Dross discipline from day one. Dross is the oxide layer that forms on the molten surface. Every kilo of dross is solder you bought and did not use, plus the labour to remove it. Two design features help:
- A full nitrogen (N₂) tunnel displaces oxygen over the wave. Southern Machinery documents roughly a 90% reduction in dross generation with N₂ on the S-SW450.
- A stand-by mode that reduces the solder wave rpm until a board is near the pot, cutting dross generation during idle time.
Neither feature removes the need to skim the pot and check the wave's stability — they just change how often.
Lead clearance and hole fill. The S-SW450 uses recipe-driven automatic lead clearance, and raises the upward force of the waves just as the PCB passes over them to promote topside hole fill. Both behaviours depend on the mechanical setup being correct — a board sitting too high in the rails will not see the wave the way the recipe assumes.
How to set up the wave soldering machine solder pot
Stage 5: Set the timer and control parameters
Timer and interlock configuration is where the machine stops being a manual appliance and starts being production equipment. Set:
- Preheat and start sequencing so the pot reaches temperature and the wave stabilises before the conveyor is enabled.
- Shift or shift-pattern timers matching your actual production calendar — an incorrect timer is a common cause of "the machine was cold when the operator arrived".
- Stand-by and idle behaviour, including the wave stand-by mode described above.
- Safety interlocks and alarms — emergency stop, over-temperature, flux level, conveyor jam.
The S-SW450 runs a common Windows-based operating system and GUI shared across Southern Machinery's wave, reflow and cleaning equipment, with data logging and trending of critical machine parameters. If two machines in your plant share that GUI, standardising parameter names across them removes a whole class of operator error.
How to set up the wave soldering machine timer
Stage 6: Dry run, then first article
Run the machine empty first: conveyor through all speeds, fluxer spraying onto a dummy panel, pot held below wave-operating level. You are proving the mechanical setup, not the process.
Then run a first-article board and judge it on the joints, not on the readings: topside hole fill, fillet formation, bridges, icicles, flux residue. If the joints are wrong, re-check the mechanical setup before you re-tune the profile. In our experience the conveyor and the fluxer cause more first-article failures than the thermal profile does.
For the outfeed side, a dedicated chain unloading conveyor keeps the board path continuous and prevents the manual handling that damages joints and distorts freshly soldered assemblies:
Special unloading conveyor for wave soldering machine (chain)
Verified reference: the S-SW450 nitrogen wave soldering machine
Use this table to check the mechanical and process features your own specification should cover:
| Feature | Verified specification | Why it matters in production |
|---|---|---|
| Model | Southern Machinery S-SW450 | Positioned for mid-to-high volume production |
| Transport system | Titanium double claw | Stability for heavy boards; corrosion resistance |
| Atmosphere | Full nitrogen (N₂) tunnel | Limits oxidation, improves wetting, documented ~90% dross reduction |
| PCB width | 50 mm – 450 mm | Covers narrow LED strips through wide industrial motherboards |
| Preheating | 3–4 stages (IR + convection) | Thorough thermal soak for thick multi-layer copper boards |
| Solder pot | Titanium, lead-free capable | Withstands Sn/Ag/Cu alloys with consistent thermal mass |
| Fluxer | Servo-driven spray fluxer | Precise, programmable coating; less flux consumption and cleaning |
| Control | Common Windows-based OS and GUI (wave / reflow / cleaning); parameter data logging and trending | Shared operator experience, traceable process data |
| Additional value features | Lifetime warranty on solder pot casting (original owner); recipe-driven automatic lead clearance; wave upward-force boost for topside hole fill; stand-by wave mode to limit dross; combination 2D/1D barcode reader for process control | Lower consumable cost and better hole fill on demanding boards |
The S-WS350B is the lead-free dual-wave model in the same family, with a heavy-duty transport system, reinforced titanium claws, high-strength aluminium rails and a 25B chain, an inverter-controlled motor, manually adjustable slide angles, and a board sensor that provides a production quantity record function. Larger nitrogen models — S-WS610 and S-WS650 — extend the range when board size or throughput demands it.
Confirm the specification for your configuration at quotation: pot capacity, preheat zone count and power requirements vary by model and by the boards you intend to run.
Preventive maintenance schedule for a wave soldering machine
Maintenance is what turns a good first-article result into a repeatable one. A workable baseline:
| Interval | Task |
|---|---|
| Daily / per shift | Skim dross from the solder pot; check wave shape and stability; check flux level and spray pattern; confirm conveyor runs true with no board drift; check emergency stop and alarms |
| Weekly | Clean flux spray nozzles and the spray containment area; inspect conveyor claws/fingers for wear or solder build-up; check preheat zone temperature readings against setpoints; verify transport height and rail parallelism |
| Monthly | Inspect and clean wave pump and impeller; check pot level and alloy condition; inspect wiring and connectors in the flux area for corrosion; verify timer and stand-by settings against the production calendar; review logged process parameter trends for drift |
| Quarterly / periodic | Replace worn transport claws and seals; clean the pot and inspect the casting; verify calibration of temperature sensors; service pumps and motors per the manual; review spare-parts stock against consumption |
Two disciplines make this schedule actually hold: keep a machine log of maintenance and parameter changes, and keep consumables in stock — sealed transport claws, nozzles, filters and seals. A line stopped for a worn finger or a clogged nozzle costs far more than the part.
Pallet and fixture condition belongs in the same routine. Flux accumulates on wave solder pallets and fixtures and distorts board position over time; batch cleaning of pallets and fixtures restores flatness and keeps chemistry off the conveyor:
How to clean wave soldering / reflow oven pallets for a smart EMS factory
Typical application scenarios
Wave soldering remains the highest-throughput way to solder through-hole joints, and it is where Southern Machinery equipment is most often deployed:
- EMS / contract manufacturing — mixed-technology boards with SMT on top and THT on the bottom, where changeover frequency and line balance matter as much as throughput.
- Automotive electronics — power boards, control modules and sensor assemblies, where hole fill and joint consistency are reliability requirements rather than preferences.
- Medical electronics — where process traceability and repeatability support regulatory documentation.
- Industrial control and power supply — transformers, relays, terminal blocks and heavy copper where the thermal mass demands real preheat capacity.
- LED lighting and display — long, narrow boards and high-volume lamp and driver PCBA.
- Home appliances and consumer electronics — air conditioners, televisions, microwave ovens, induction cookers, kettles and vehicle power supplies.
How the wave soldering machine fits into a complete PCB assembly line
A wave soldering machine is a station, not a solution. In a Southern Machinery SMT/THT line the sequence runs:
- SMT front end — stencil printing (SP series), solder paste inspection, pick-and-place, reflow, AOI.
- THT insertion — manual insertion, or automatic axial, radial, odd-form and terminal insertion machines for the components that carry volume.
- Input conveyor — the SBF330 feeds PCBs or pallets into the soldering inlet and synchronises transport with the machine.
- Wave soldering — spray fluxing, 3–4 stage preheat, nitrogen wave soldering, cooling.
- Post-soldering — inline lead trimming (S-320AT) for long leads, then PCBA cleaning to remove flux residue.
- Inspection and outfeed — AOI, then unloader or palletising.
Southern Machinery builds the whole chain, which is the practical argument for buying the stations from one supplier: transport heights, SMEMA interfaces, board width ranges and cycle times are specified to work together rather than being reconciled after delivery.
Key selection parameters for a wave soldering machine
Bring these to a quotation conversation:
- Board width and thickness range — the S-SW450 covers 50–450 mm; check where your widest and narrowest products sit.
- Solder pot capacity and alloy — lead-free Sn/Ag/Cu, and whether the pot is rated for it.
- Preheat configuration — number of zones and IR/convection mix against your heaviest copper.
- Atmosphere — air versus nitrogen, and the dross and wetting implications of each.
- Fluxer type — spray fluxer with programmable footprint, or an alternative fluxing method.
- Transport system — claw or finger type, chain specification, and pin pitch for your pallets.
- Conveyor speed range and direction — and how it synchronises with upstream and downstream equipment.
- Control and traceability — recipe management, barcode reading, parameter data logging, MES connectivity.
- Utility requirements — power, exhaust, nitrogen supply and consumption, floor loading.
- Spares and service — consumable availability, training and response arrangements.
ROI, quality and throughput perspective
The financial case for a properly commissioned wave soldering line comes from four places:
- Dross and alloy consumption. Nitrogen protection and stand-by wave modes reduce the solder you buy and never ship. Dross is the most visible recurring loss in a wave soldering cell.
- Rework and touch-up labour. Consistent hole fill and clean fluxing reduce the manual soldering station downstream — usually the single largest labour cost in THT assembly.
- Uptime. A maintenance schedule and a stocked spares kit convert unplanned stoppages into planned ones. Unplanned stops are where the throughput argument is actually won or lost.
- Changeover speed. Recipe-driven parameters and a shared control interface shorten the time between "last good board of run A" and "first good board of run B", which is the real constraint for high-mix EMS production.
Quality is the compounding factor: wave soldering that is mechanically correct is repeatable, and repeatability is what allows you to reduce inspection sampling, defend process documentation, and stop paying for the same defect twice.
FAQ
What is a wave soldering machine used for?
A wave soldering machine solders through-hole (THT) components to a PCB by passing the board over a pumped wave of molten solder. It applies flux, preheats the assembly, solders the joints in one pass and cools the board on the way out. It is the standard high-throughput method for through-hole and mixed-technology PCB assembly.
What does wave soldering machine setup include?
Setup covers the accessory kit and spare-parts check, frame levelling, conveyor alignment and transport height, flux spray tank installation and fluxer pattern setup, solder pot preparation and alloy charge, timer and interlock configuration, and a dry run followed by first-article verification.
How often does a wave soldering machine need maintenance?
Dross should be skimmed every shift, and the wave, fluxer and conveyor checked daily. Weekly tasks include cleaning spray nozzles and inspecting transport claws; monthly tasks include the wave pump, pot condition and parameter review. Follow the machine manual's schedule for your specific model and duty cycle.
How do you reduce dross on a lead-free wave soldering machine?
Two methods work together: a nitrogen tunnel that displaces oxygen over the wave — Southern Machinery documents roughly a 90% dross reduction with N₂ on the S-SW450 — and a stand-by mode that reduces wave rpm while no board is being soldered. Regular skimming and correct pot temperature control limit what remains.
Does a wave soldering machine integrate with existing SMT lines?
Yes. Wave soldering machines communicate with loaders, buffers, input conveyors and unloaders over the SMEMA interface, and the transport height and conveyor speed are set to match adjacent equipment. In a Southern Machinery line the SBF330 input conveyor feeds the soldering inlet, and downstream AOI and cleaning stations follow the outfeed.
Can wave soldering handle mixed SMT and THT boards?
Yes, and that is its main use in EMS production. SMT components are placed and reflowed first; through-hole components are then inserted manually or by automatic insertion machines and soldered in a single wave pass, provided the boards are designed for it — adequate hole clearance, correct pad geometry and appropriate thermal reliefs.
What support does Southern Machinery provide?
Southern Machinery supplies the machines, spare parts, sub-assemblies, retrofit and upgrade kits, repair kits, on-site training and overhaul services. Engineering support covers configuration, line integration and commissioning, and covers legacy equipment from other brands as well as our own.
Contact Southern Machinery for configuration advice
Southern Machinery has designed and manufactured SMT and THT PCB assembly equipment in Shenzhen, China since 2011, serving 237+ customers worldwide across EMS, automotive, medical, industrial control, LED and power supply manufacturing. We supply individual machines and complete SMT / THT / wave soldering / board handling / inspection lines, with spare parts, training and global service support.
Send us your board list — sizes, thicknesses, component mix and target throughput — and we will recommend a wave soldering configuration and the maintenance and spares package that fits it.
- Email: jasonwu@smthelp.com
- Phone / WhatsApp: +86 136 0256 2576
- Website: www.smthelp.com
- Machine photos and videos: ph.smthelp.com
- Catalogues and file downloads: file.autoinsertion.com
Comments