
Starting an Odd Form Insertion Machine: Process Start and Program Files | Southern Machinery
Lesson 1 of Southern Machinery's odd form machine training series covers the start process - power, air pressure check, controller boot and software launch - and how to create, name and load a program file on a THT odd form insertion machine.
Sep 20, 2026 · Updated Sep 20, 2026 · Southern Machinery
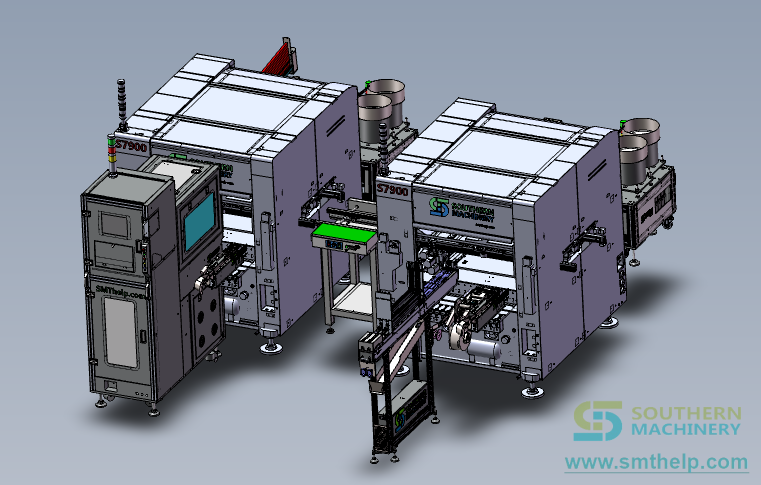
Starting an Odd Form Insertion Machine: Process Start and Program Files | Southern Machinery
Every odd form insertion machine program in your plant begins the same way: an operator presses a power switch, verifies air pressure, boots the controller, opens the machine software and creates a program file. It takes less than two minutes and looks like a formality. In practice it is the step where a large share of the machine's later problems are either prevented or planted — because a program created without a naming rule, loaded without checking which file is actually active, or run on a machine whose air supply is out of specification will produce defects that only surface at wave soldering, AOI or functional test.
This is Lesson 1 of Southern Machinery's odd form machine training series, covering the start process and program file establishment. The complete lesson is embedded below.
<iframe width="100%" height="480" src="https://www.youtube-nocookie.com/embed/MqYePK-uF-U?rel=0" title="Lesson 1 on Odd Form Machine - Start process and program files" frameborder="0" allow="accelerometer; autoplay; clipboard-write; encrypted-media; gyroscope; picture-in-picture; web-share" referrerpolicy="strict-origin-when-cross-origin" allowfullscreen></iframe>
Direct link: watch Lesson 1 of the odd form machine training series on YouTube
What is this machine used for?
An odd form insertion machine is the THT station on a DIP line that handles what a radial or axial inserter cannot. Transformers, relays, connectors, fuse holders, terminal blocks, radial electrolytic capacitors, inductors, lamps and optoelectronic parts are neither radial tape, axial tape nor surface mount. They arrive in trays, tubes, vibratory bowls or loose bags, with different lead pitches, asymmetric bodies, different weights and no shared presentation standard.
The machine picks each component with a vacuum nozzle or a mechanical gripper, presents it to the board under vision guidance, seats the leads into the programmed holes to a programmed depth, and clinches them underneath so the board can continue into wave soldering without being re-handled.
That entire capability is stored in program files. The machine has no idea what a connector is; it knows which file is loaded, and that file tells it which component is picked from which feeder position, where the part sits on the board, how deep the leads are pushed and how the leads are clinched. Starting the machine correctly and creating the program file correctly is therefore not an administrative task — it is the prerequisite for every insertion cycle that follows.
As a reference point for the equipment class, Southern Machinery's documented S-70LD odd form insertion machine specification describes four insertion heads with four adjustable feeders (tape or vibratory plate), an insertion speed of 4,000 CPH (3,800 CPH noted for radial resistor insertion), ±0.05 mm insertion accuracy, components from 3×3 mm to 30×30 mm and up to 50 mm high, PCBs from 50×50 mm to 300×300 mm at 0.8–5.0 mm thickness, a 220 V AC / 0.8 kVA supply, air at 0.4–0.6 MPa, noise at or below 75 dB, a machine weight of roughly 1,000 kg, and an industrial computer with vision guidance that recognises lead geometry. The S7900 series addresses the same class of work at other board sizes and throughput levels.
The start process, step by step
The lesson walks through the machine's power-up and program-creation sequence exactly as an operator performs it on the floor. These are the five steps shown in the video:
- Turn on the power switch. Main power to the machine before anything else, so the controller, servo drives and vision system come up in the correct order.
- Check that the air pressure is compliant. Insertion force, gripper actuation and blow-off release are pneumatic on this class of machine. The documented operating range for the S-70LD platform is 0.4–0.6 MPa; the lesson treats the check as a mandatory start-up step rather than an occasional maintenance item.
- Turn on the computer. The industrial controller boots and initialises its interface to the machine.
- Click the S icon on the desktop to open the software. The machine software loads — this is the layer that owns the component data, the PCB data, the tool/nozzle data and the program files themselves.
- Create the program. Click program file → create a new program → enter the name of the new program → load to load the new program. The name of the loaded program is displayed in the program-name area of the screen, and creation is complete. That displayed name is the operator's confirmation that the correct file is active before any board is loaded.
Steps 1 to 4 are machine readiness. Step 5 is the beginning of the product-specific work that the rest of the training series builds on — component data and editing (Lesson 3), PCB data and mark points (Lesson 4), blockdata teaching (Lesson 5), pickup position setting (Lesson 6), material settings (Lesson 7) and array data with automatic learning (Lesson 8).
Why the start sequence is not a formality
Two plants with identical machines get different yields, and the difference often starts at power-up:
- Air pressure is a process parameter, not a utility. Below the specified range, a vacuum nozzle does not seal cleanly against a component and a gripper does not close reliably. The machine still runs — it simply misses picks, drops parts or seats leads to inconsistent depth. Checking pressure at start-up, and not only when a fault appears, is the cheapest defect-prevention measure on the line.
- Power and software order matters. Booting the controller after the machine, or reopening the software mid-shift, can leave the machine at an undefined state relative to the loaded program. A defined start-up sequence gives a defined starting state — which is what first-article verification depends on.
- The active program file is a controlled document. The lesson's final step exists to answer one question before production: which file is loaded? If the answer is not visible on screen and confirmed by the operator, there is no control over which product the line is about to build.
- File names are the operator's interface. A program name that identifies product, revision and panel layout turns a changeover into "load and run" and turns a repeat order into "load and verify". A program name like test1, test2, new turns it into a search. Naming is not bureaucracy; on a high-mix DIP line it is changeover time.
- Creation is the start of a chain of data layers. A newly created program is empty. Everything the machine needs — feeder positions, tool assignments, insertion depth, clinch direction, mark points, array rules — is entered on top of it. Starting the file correctly means the layers that follow have somewhere consistent to live.
Program files, revisions and backups
The training demonstrates file creation on one platform's software. The naming, menus and file structure differ between machine platforms, controller generations and software revisions, so Southern Machinery's training content reflects the software being demonstrated rather than a universal standard. What a buyer should expect, and what any plant should define regardless of platform:
- One program file per product (per panel layout). Distinct products get distinct files, with a documented rule for naming that includes the board identifier and revision.
- A revision discipline. When a board changes, the file changes and the revision in the name changes with it. Running an obsolete revision is one of the least visible failure modes in THT assembly, because the machine does exactly what it is told.
- Backup and restore. Program files are production assets. Machines and controllers get replaced; files must exist outside the machine, with a documented restore procedure that a technician can execute without the original programmer present.
- Access and change control. Decide who may create, edit and delete programs, and keep a record of changes. This is the same traceability logic that MES systems apply to SMT; the DIP line deserves it too.
- A first-article rule. After a new program is created or a returning program is loaded, the first board is verified against the drawing before the line runs at rate. The start-up sequence ends in verification, not in production.
Typical applications
1. Home appliance control boards. Air conditioners, washing machines and microwave boards carry relays, connectors and transformers that sit outside radial tape. Many SKUs share the same component families, so a library of well-named, controlled program files is what lets one machine support a whole product family.
2. Power supply and adapter PCBA. Vehicle power supplies, energy-saving power supplies and ballasts use heavy transformers and large radial capacitors with tight pin patterns. Start-up checks matter most here: an under-pressure air supply produces exactly the bent-lead and floating-high defects that these parts are least tolerant of.
3. LED drivers and lighting electronics. Long, narrow boards and lighting panels push the extremes of the machine envelope and often use orientation-sensitive optoelectronic parts. A confirmed, correctly loaded program file is what makes polarity control meaningful across a batch.
4. Automotive and vehicle electronics. Car audio and vehicle power supply boards mix SMT and THT content and carry polarity-sensitive parts. Traceable program naming and revision control are what allow a batch to be tied back to the file that produced it.
5. EMS and ODM plants running high-mix DIP assembly. Where one line builds many board variants sharing component families, program file management is a changeover asset. A returning order should be a program load, a start-up check and a first article — not a re-teach.
How it fits into a complete PCB assembly line
Start-up and program files are one station's concern, but the consequences travel the whole flow:
- SMT block first. Stencil printing, SPI, pick-and-place and reflow build the SMD side. Southern Machinery's SMT range covers this stage — stencil printers such as the SP-1008 and SP-1200, semi-automatic platforms such as the S-530L for lens and LED component mounting, higher-volume placement on the S-DU800 series, SMT intelligent reel storage for traceable FIFO kitting, and SPI/AOI inspection.
- Component preparation. Radial taping, lead forming, bulk capacitor taping with polarity check, axial-to-radial tapping and lead cutting convert loose parts into insertion-ready format before any program is loaded. A correct program cannot compensate for badly formed leads.
- Feeding. Tape, tube, tray, vibratory bowl and belt presentations determine what the program must reference: which feeder position holds which part, and how that part is presented. Feeder selection and program structure belong in the same conversation.
- THT insertion block. The odd form inserter works alongside the S-3010B radial inserter, the S-3000 radial insertion machine for DIP assembly, the S4000 axial inserter and the S7020 Series PIN/eyelet/terminal inserter. Each station holds its own program files, which is why consistent naming and revision rules across machines let a product move between lines without being set up from zero.
- Soldering and lead finishing. Inserted boards move into lead-free wave soldering — the S-WS450, or the PC-controlled dual-wave S-WS350B — then to the S-320AT inline auto lead cutter, with the S-500G dip soldering machine and S100B desktop selective soldering machine covering smaller or mixed-technology batches.
- Cleaning and inspection. Stencil and pallet cleaning, SPI, AOI, online wave-solder appearance checking and X-ray equipment catch what insertion produced. A program or start-up error is not contained at the insertion station: it arrives at the wave as a floating-high part or a bent lead, across the whole batch.
- Board handling and support. Magazine loaders and unloaders, conveyors such as the SBF330 wave solder input conveyor, turnover units and buffer storage keep the line flowing while a first article is verified. Behind that sits the service ecosystem — spare parts for Panasonic, Fuji, JUKI, Yamaha, Samsung, Siplace, DEK, TDK and Universal platforms, custom nozzles and grippers, feeder calibration, repair, retrofit and operator training.
Key selection parameters
The table below lists the parameters worth confirming in a quotation. Where a documented figure exists for the S-70LD platform it is shown as a reference; everything else is a category to verify against your own build.
| Parameter | Documented S-70LD reference | What to confirm for your build |
|---|---|---|
| Start-up procedure | Documented in this training lesson: power, air pressure, computer, software | Whether a written start-up checklist ships with the machine and is used on the floor |
| Air supply requirement | 0.4–0.6 MPa documented | Site air quality, filtration, and how pressure loss is alarmed rather than noticed |
| Program file concept | Program files created, named and loaded from the controller software | How programs are created, renamed, copied, exported and backed up |
| Revision control | Not a machine specification — a plant rule | Whether the supplier supports a naming/revision convention and file backup |
| Data layers per program | Component data, PCB data and mark points, blockdata, pickup positions, material settings, array data | Which of these exist as separate editable layers on the platform you are quoting |
| Component envelope | 3×3 mm to 30×30 mm, up to 50 mm high | Your largest, heaviest and most fragile odd-form parts |
| Insertion accuracy | ±0.05 mm | Hole-to-lead clearance and positional tolerance in your board design |
| Insertion heads / feeders | 4 heads, 4 adjustable feeders (tape or vibratory plate) | Head count, tool-station count and the feeder mix your part list needs |
| Speed class | 4,000 CPH (3,800 CPH noted for radial resistors) | Required rate against components per board and changeover frequency |
| PCB range | 50×50 mm to 300×300 mm, 0.8–5.0 mm thick | Smallest board, largest panel and maximum panel weight |
| Tooling | Vacuum and gripper tooling; in-house custom geometry | Which part families need a gripper, and how a custom tool is quoted |
| Line interface | Inline station with SMEMA handshake | Conveyor height, direction and handshake with your existing DIP line |
| Utilities and environment | 220 V AC, 0.8 kVA; air 0.4–0.6 MPa; noise ≤75 dB | Site power, air supply, noise specification and floor loading |
| Footprint / weight | Approximately 1,000 kg | Access for setup, program work, tool changes and maintenance |
| Training and documentation | Machine operation manuals and an 8-part training series | Operator training depth, language, and how a new programmer is brought up to speed |
Beyond the specification, confirm what you are buying with the machine: a written start-up checklist, a program-file naming and revision rule that your team agrees to follow, a backup and restore procedure, a first-article verification rule that is documented rather than remembered, and training that reaches the operators who actually run the line.
ROI and quality perspective
From a buyer's perspective, the start-up and program-file layer is where specification turns into production money:
- The manual baseline is the number to beat. Southern Machinery's published analysis of manual odd-form insertion notes that hand-inserted parts take approximately 4 to 10 seconds each depending on operator familiarity, part orientation and presentation, and that across 5,000 boards with four odd-form components per board that variability can add 8 to 16 hours of unplanned labour per shift. Automation removes that labour — but only if the machine is started correctly and the right program is loaded.
- Defects created at insertion are paid for later. The same analysis notes that for a transformer with 6 to 10 pins, a single non-seated pin can become a field failure costing many times the board's assembly value, and that reworking odd-form defects after wave soldering and cleaning takes roughly 3 to 5 minutes per board, with a real risk of damaging adjacent components. A two-minute start-up check is the cheapest control against that chain.
- Machine performance is consistent; operator procedure is not. The value of a programmed machine is that it executes the same cycle every time. That property only holds if the start process is followed and the active program is confirmed. Where those habits are missing, a plant can run a capable machine and still see shift-to-shift variation.
- Program files are a changeover asset. On a high-mix DIP line, a returning order should be a program load plus a first article. If programs are unnamed, unversioned and not backed up, every repeat order starts with a search, a guess and a re-learn — and the ROI of the machine is spent on setup instead of output.
- It is a traceability asset. As customers push for documented process control and ESG-style reporting, knowing which program revision and component revision produced a batch is the difference between an answer and a guess — and it decides whether the machine is still supportable years after installation.
Model it with your own numbers: odd-form components per board, boards per order, changeover frequency, minutes lost per setup, rework minutes per defect and the cost of a defect discovered after soldering. In most plants the arithmetic favours a platform with real program data, a documented start-up procedure and a supplier who trains the people running it — long before it favours more manual stations.
FAQ
What does the start process of an odd form insertion machine involve?
Southern Machinery's Lesson 1 shows five steps: switch on the machine power, check that the air pressure is compliant, turn on the controller computer, launch the machine software from its desktop icon, and create and load a new program file. The displayed program name is the operator's confirmation of which file is active before production starts.
Why does air pressure matter so much on an odd form inserter?
Insertion force, gripper actuation, vacuum pick-up and blow-off release are pneumatic on this class of machine. If supply pressure falls below the specified range — 0.4–0.6 MPa on the documented S-70LD platform — parts are not held reliably and leads are not seated to consistent depth. The faults appear as missed picks, bent leads and components floating high at the wave, not as an obvious machine alarm.
How do you create a program file on an odd form insertion machine?
On the platform demonstrated in the lesson, the operator opens the program file menu, selects to create a new program, enters the program name, and clicks load. The new program name then appears in the program-name area of the screen. Component data, PCB data and mark points, blockdata, pickup positions and material settings are then configured on top of that file in the later lessons of the series.
Should each PCB product have its own program file?
Yes. Best practice is one program file per product and panel layout, with a naming rule that identifies the board and its revision, plus a documented backup and restore procedure. Distinct products in a shared file — or an unnamed file — is how a plant ends up running an obsolete revision without knowing it.
What happens if the wrong program is loaded?
The machine will faithfully build the wrong product. Odd form insertion machines execute the loaded file exactly; there is no inherent check that the board in the conveyor matches the program. That is why the loaded program name is displayed and confirmed at start-up, and why a first-article verification rule after every program change is standard practice on a controlled DIP line.
Do I need to send operators for training to run this machine?
Southern Machinery supports installation and operator/programmer training and publishes an eight-part odd form machine training series covering start-up, nozzle data, component data, PCB data and mark points, blockdata teaching, pickup position setting, material settings and array data. Training depth, language and delivery — in-plant or at Southern Machinery in Shenzhen — should be confirmed in the quotation.
Contact Southern Machinery
Southern Machinery (Shenzhen, China; established 2011; 237+ global customers) designs and manufactures SMT, THT and PCB assembly automation — insertion machines, wave soldering, board handling, cleaning, inspection, feeders and nozzles, and the spare parts, training, retrofit and repair services around them.
For help evaluating an odd form insertion machine, training your operators, or reviewing a complete SMT/THT line, contact the team:
- Email: [jasonwu@smthelp.com](mailto:jasonwu@smthelp.com)
- Website: www.smthelp.com
- Catalogs, manuals & documents: file.autoinsertion.com
- Product images: ph.smthelp.com
- Machine operation manuals & training library: SMT/THT machine operation manual library on smthelp.com
Watch the complete odd form machine training series on the Southern Machinery YouTube channel, including this first lesson on the start process and program files.
Comments